As it's bank holiday weekend and the forecast for Bank Holiday Monday here in Nottingham is quite positive which means one thing. Someone will be holding a barbecue, somewhere. I've been invited to one on Monday and been instructed NOT to bring any meat with me as they already have plenty. So I've decided to bake some biscuits to take with me instead as no-one wants a full on dessert after a BBQ.
I've not really baked with chocolate for a while and having seen a few cake shops serving up marble cakes recently I thought I would get in on the act with my own recipe for marbled cookies
It might look like something complex but I've been told it's pretty easy to create a marbled effect to cakes and biscuits so I thought today I would try something new and see if I could do it myself. So here's how I made my marbled cookies.
 |
| My chocolate marble cookies will make an excellent post-Barbecue light bite |
It might look like something complex but I've been told it's pretty easy to create a marbled effect to cakes and biscuits so I thought today I would try something new and see if I could do it myself. So here's how I made my marbled cookies.
The Lone Male In The Kitchen's Marble Cookie Ingredients
250 g of plain (all-purpose) flour
250 g of caster sugar
200 g of plain (dark) chocolate
125 g of unsalted butter
10 ml of milk
1 egg
2 tablespoons of olive oil
1 tablespoon of baking powder
 |
| The marbled effect inside my biscuits |
Instructions- How I made my marbled biscuits.
1. First step was to set the oven at 180 Celsius warming ready for baking. If you're using a different scale that equates to 250 Fahrenheit or Gas Mark 4. I also set up a couple of trays with baking paper.
2. I melted down the chocolate by setting up a pan of hot simmering water on the hob. Once the water was simmering I placed a large heatproof bowl over the top of the pan with the chocolate to melt down. Into the bowl I added a couple of tablespoons of olive oil to help improve the fluid nature of the chocolate.
3. In a large bowl I creamed together the caster sugar and butter together before adding the egg and then the milk until the mixture feels like a rather runny paste.
4. Having finally bought myself a cheap and cheerful sieve from Tesco it was time to put it to use. I sifted the flour and baking powder into the mixture before mixing together to form a soft dough
5. After making a large deep well in the centre of the dough I poured in the molten dark chocolate which will help to create the marble effect. I then used I knife to fold the chocolate through the dough. The aim was not to over mix and create a marbled effect.
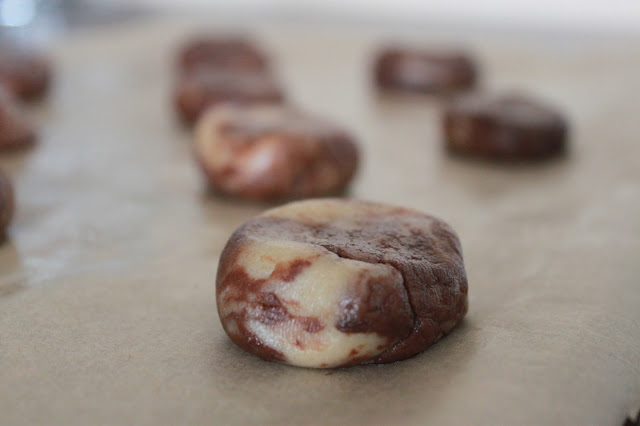
6. I shaped tablespoons of dough into balls before placing onto the baking sheet and flattening slightly. I tried to keep 3-4 centimetres of space between each ball of dough as the cookies will spread out dramatically.
 |
| Squashed down unbaked marble cookies ready to go into the oven |
7. I then baked the cookies for about 15 minutes, checking the cookies late on in that period as dark chocolate can burn easily.
8. Upon removing my baking trays from the oven I allowed my marbled cookies to cool on the baking trays for a further 5 minutes
 |
| On the baking trays straight from the oven and cooling |


No comments:
Post a Comment